Calibration & Verification Workflow
- Test Print with Slicer Pause: Before committing to a full print, slice the bracket and insert a pause command at layer height ~10 mm. Slide your actual ruler into the channel while paused to verify smooth sliding clearance before finishing the job.
- Refine Clearance if Needed: If the fit is too tight or loose, adjust Ruler H / Ruler W in the customizer and re-export.
- Cut Two 5" Test Boards: Set your gauge to 5.00", lock it with the thumbscrew, butt your speed square or straightedge against the fence, and make two clean test cuts.
- Verify Accuracy with Calipers: Measure the cut blocks with digital calipers. As shown below, an accurate offset dialed into the gauge consistently yields dead-accurate cuts (e.g., 4.99" / 5.00").
-
Dial-In Saw Offset: If your cut block measures slightly over or under your target, adjust your
Offsetparameter by that exact difference and reprint for lifetime accuracy on that circular saw.
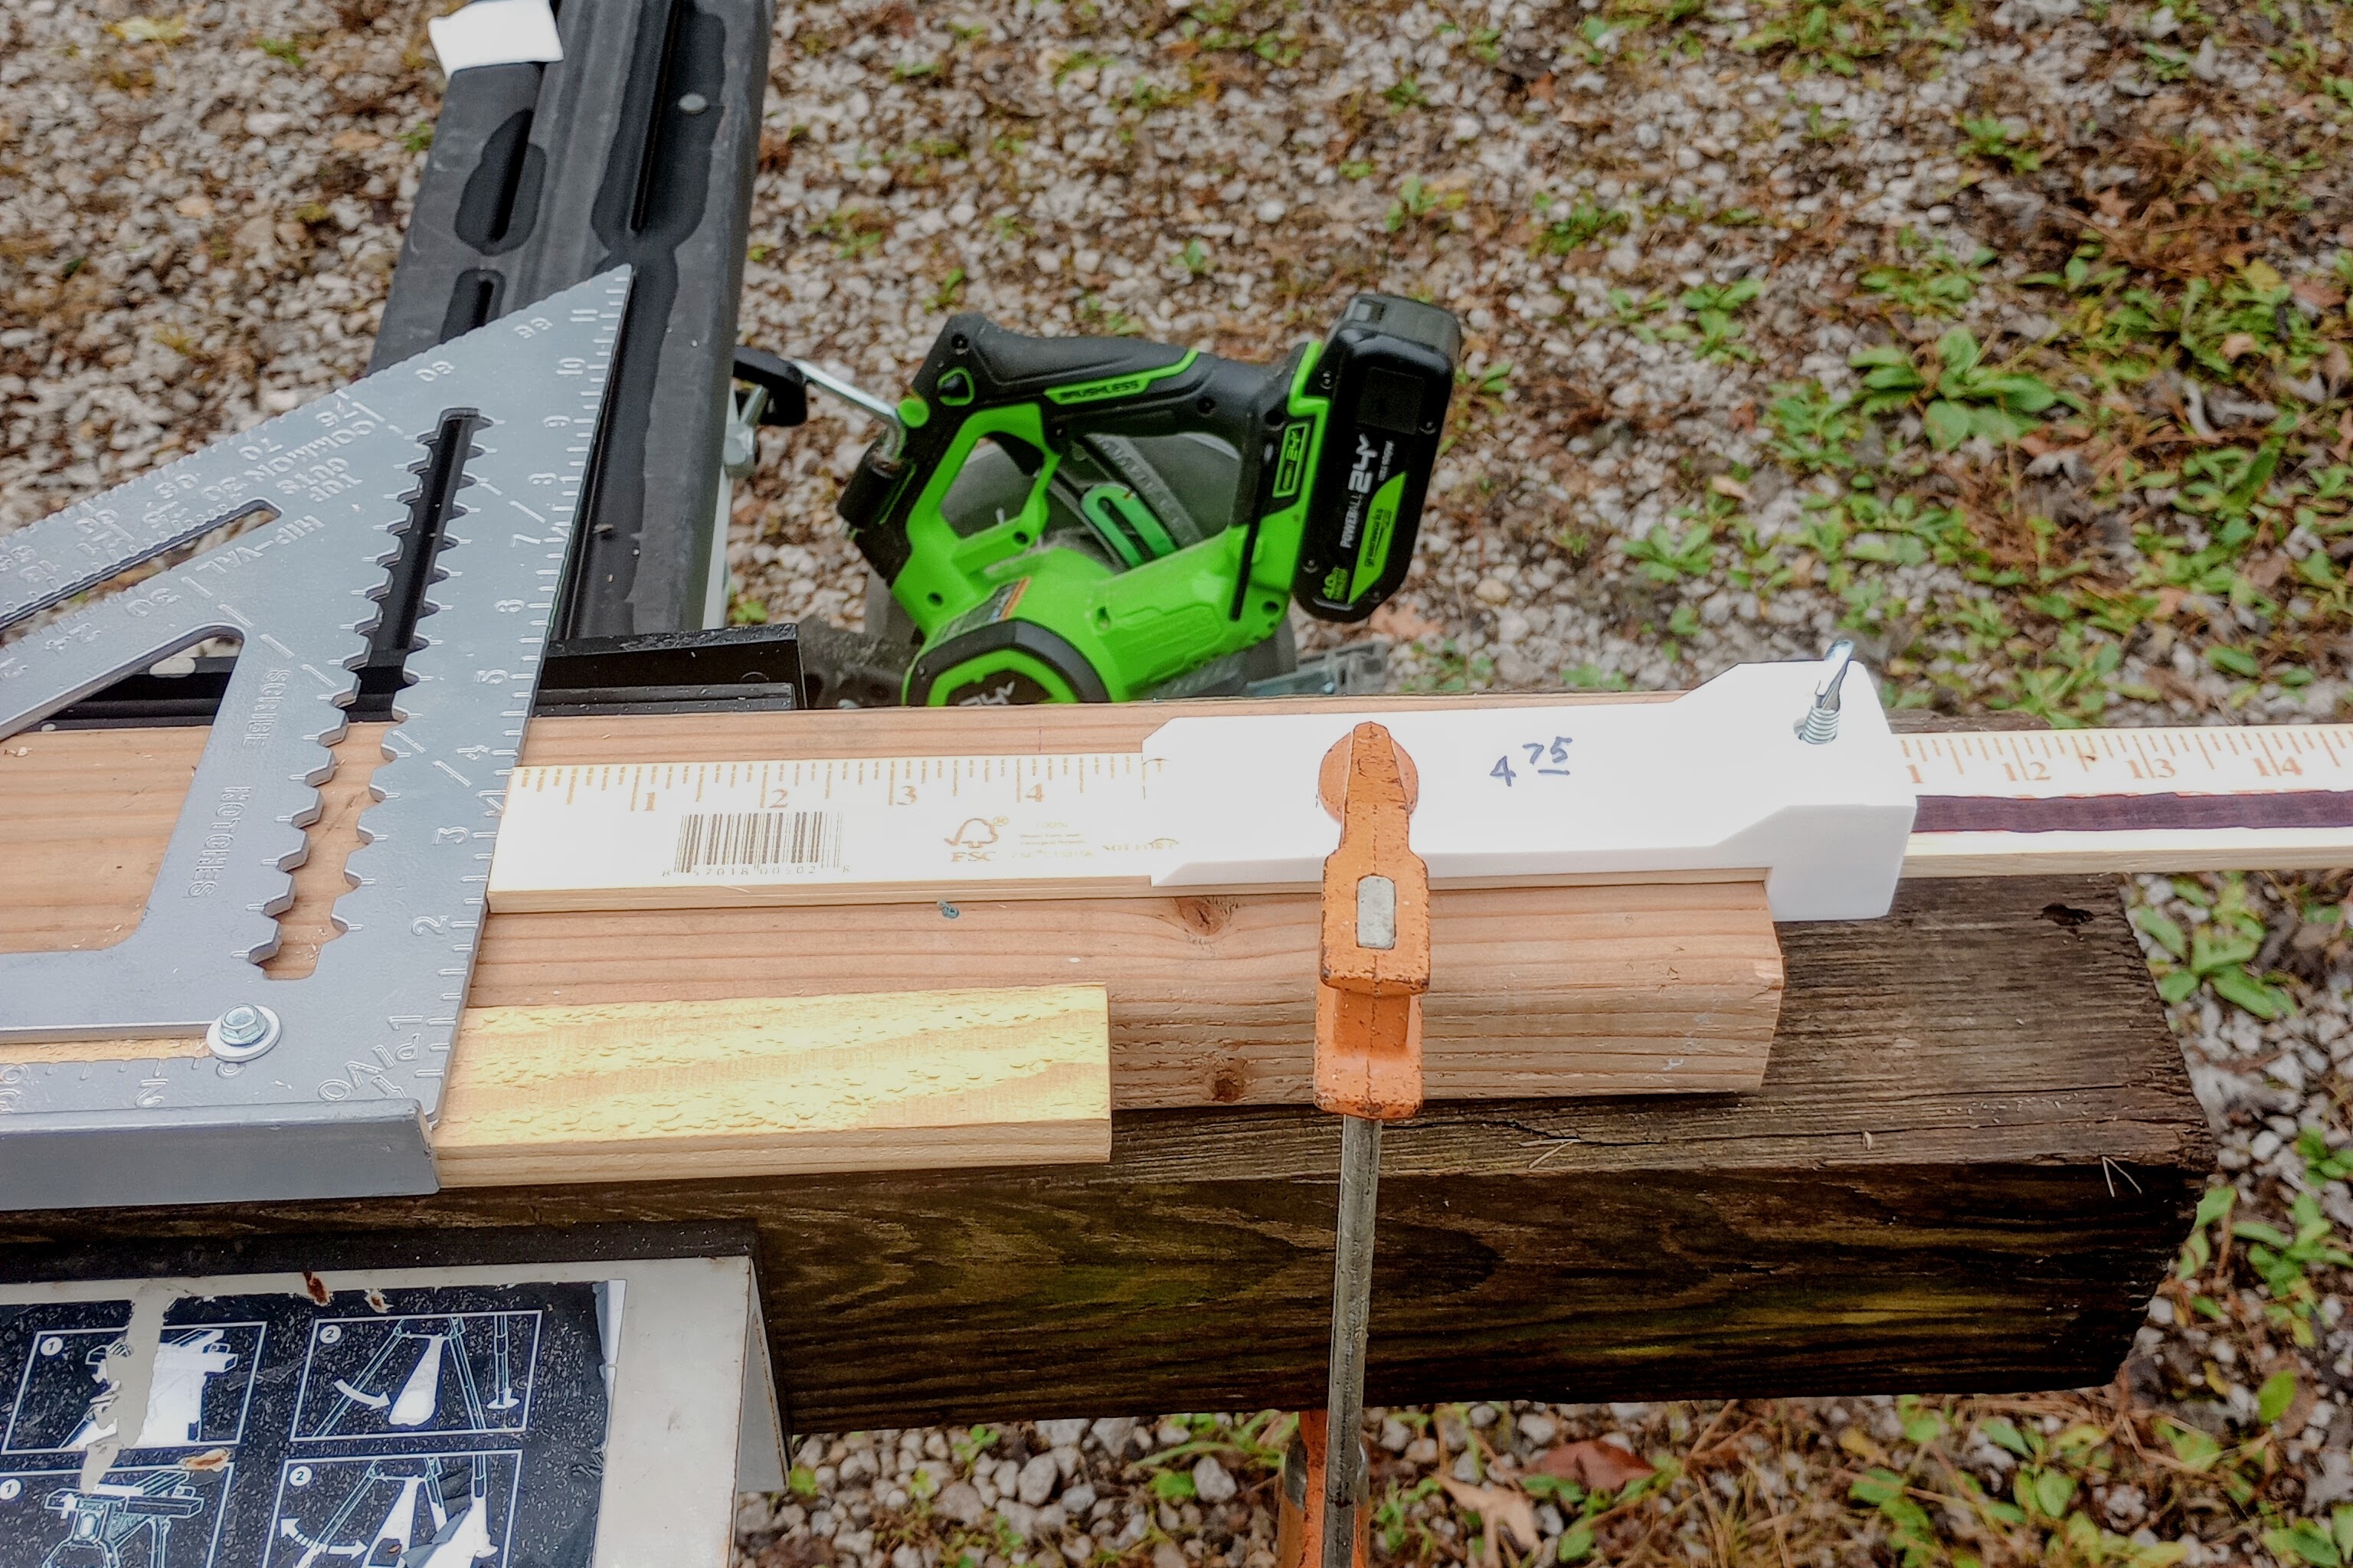
Gauge locked to ruler using 1/4" thumbscrew, referenced against speed square clamp
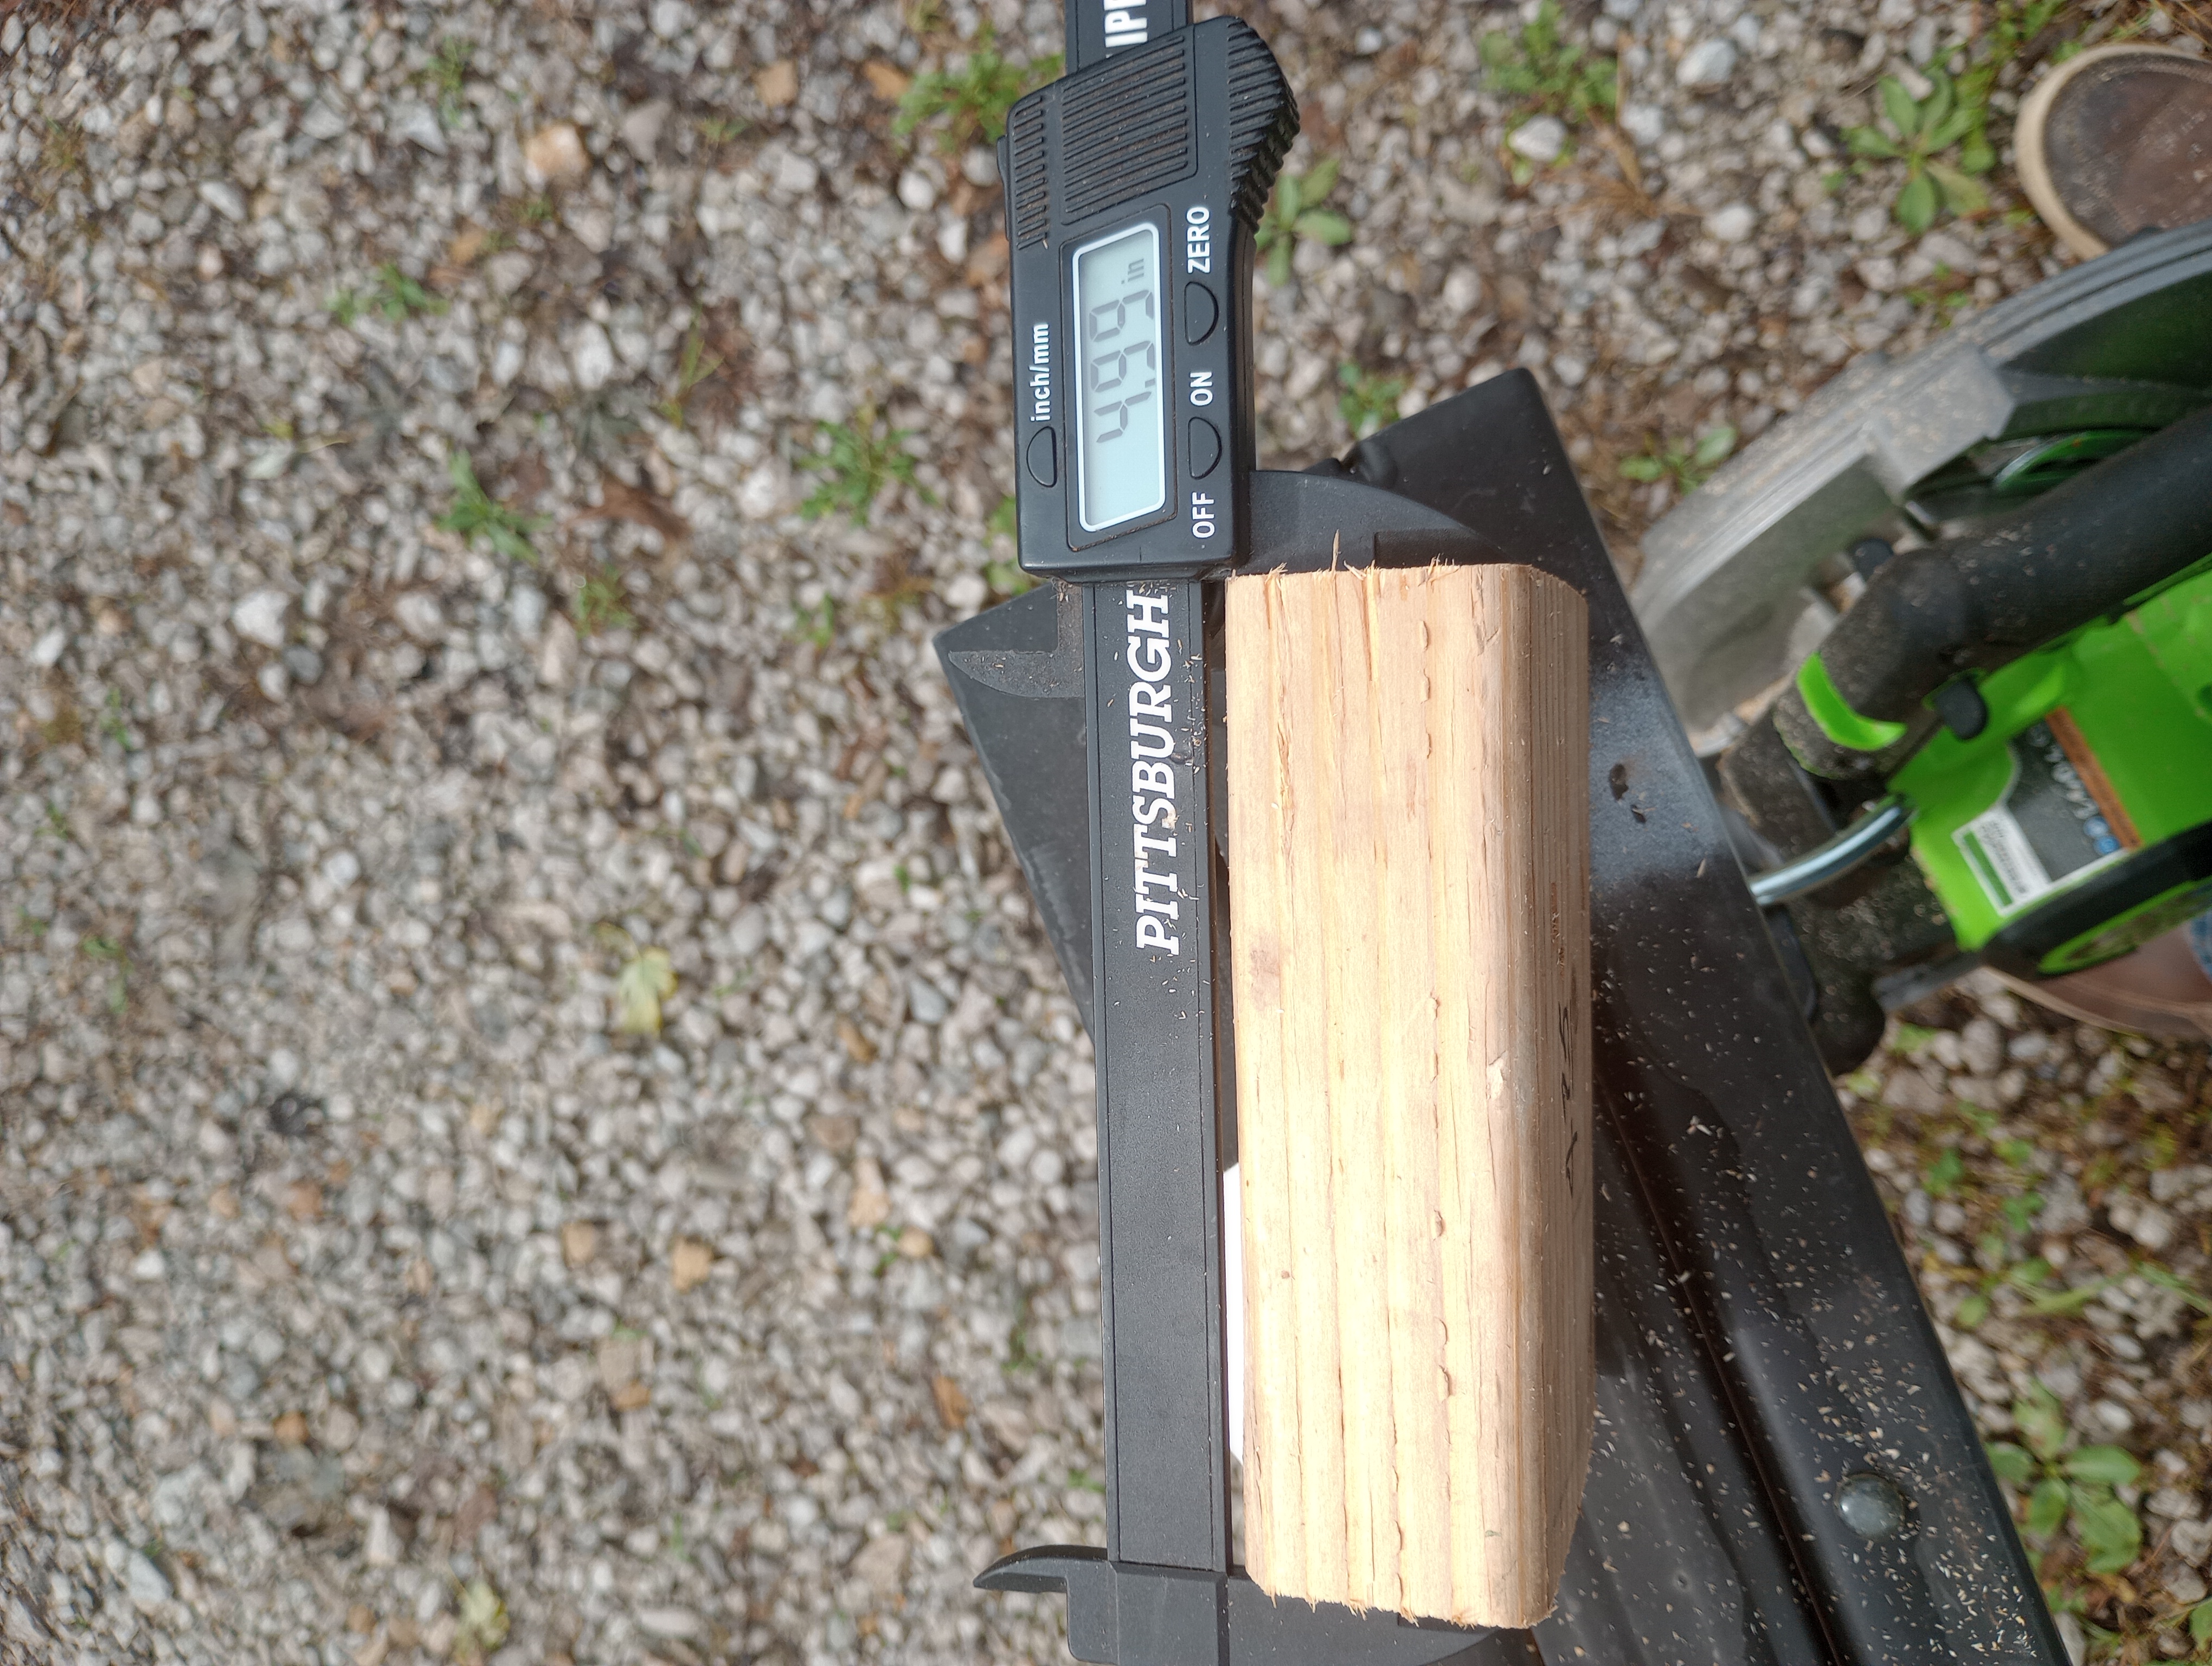
Test cut verification with calipers measuring 4.99" on a 5.00" target block